Successfully navigating a tight O’Hare connection is not about speed, but about outsmarting the airport’s three critical choke points: immigration, baggage re-check, and terminal transfers.
- Your 90-minute layover is actually closer to 20 minutes of discretionary time once fixed delays are factored in.
- Using the Mobile Passport Control app and knowing when to walk instead of taking the transit system are non-negotiable tactics.
Recommendation: Treat your layover like a tactical mission. Calculate your real connection time before you land and have a primary and backup plan for each stage of the transit process.
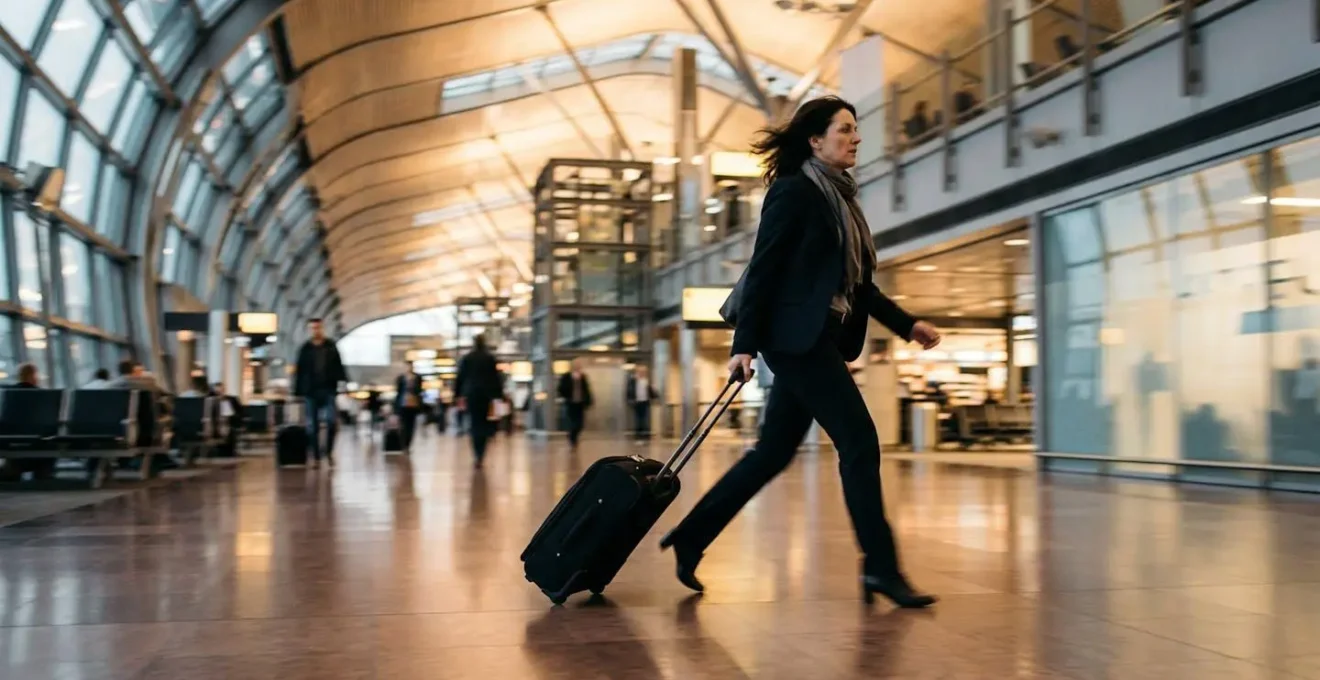
The screen on the back of the seat in front of you displays the grim reality: a 90-minute connection at Chicago O’Hare (ORD). For any UK passenger connecting to a smaller US city, this is the moment a cold dread sets in. You’ve heard the horror stories of endless immigration lines, baggage claim chaos, and sprawling terminals. The standard advice—”check the airport map” or “move quickly”—feels insultingly simplistic. It doesn’t account for the cascading delays that can evaporate an hour in what feels like minutes.
Most guides treat an airport transit as a simple, linear path. They tell you to follow the signs and take the train. But O’Hare, particularly when arriving internationally at Terminal 5, isn’t a linear path; it’s a complex system with hidden choke points and crucial decision moments. Relying on the default options is a recipe for being rebooked on the next flight, eight hours later.
The key to survival isn’t just rushing. It’s about making a series of smart, counter-intuitive decisions based on the situation on the ground. This guide abandons the generic advice and gives you the urgent, tactical playbook of a frequent transatlantic flyer. It’s about performing a “Connection Calculus” before you even deplane, knowing the choke point bypasses, and understanding the airport’s rhythm better than the thousands of other passengers scrambling alongside you.
We will break down your transit into a series of strategic missions: calculating your real window of time, navigating immigration and transfers with insider knowledge, and making the right call on baggage and security. This is how you turn panic into a plan and ensure you’re sipping a drink at your departure gate, not staring at the back of a customer service queue.
This article breaks down the most critical stages of your O’Hare transit, providing a clear roadmap to navigate the airport’s biggest challenges. The following summary outlines the key strategies you’ll discover to make your connection with time to spare.
Summary: Your Tactical Guide to Mastering an O’Hare Layover
- The Terminal Transfer Mistake That Strands International Travellers at Chicago O’Hare
- How to Navigate the Automatic Transit System Quickly Between Busiest O’Hare Concourses?
- When to Recheck Your Luggage After Clearing Chicago O’Hare Border Control?
- Airport Lounge or Concourse Dining: Which Option is Best for a Three-Hour Wait?
- How to Skip the Massive Security Queues During Chicago Winter Storm Delays?
- When to Arrive at the Immigration Hall to Beat the Dreaded Three-Hour Queue?
- When to Schedule Your Return Flight to Avoid Terrible Miami Airport Rush Hours?
- How to Escape Miami International Airport Quickly During Peak Florida Holiday Seasons?
The Terminal Transfer Mistake That Strands International Travellers at Chicago O’Hare
The single biggest error passengers make is miscalculating their *true* connection time. A 90-minute layover is a myth. The reality is a frantic race against a series of fixed time sinks. Before you even stand up, perform this urgent Connection Calculus: your flight will likely begin boarding 40 minutes before departure, and the doors will close 15-20 minutes before. Your 90 minutes have already shrunk to 70. Now, factor in immigration. According to recent airport data, the average processing time of 20-35 minutes at Terminal 5 can easily stretch to an hour during peak waves. If you have checked luggage, you must collect it and re-check it, adding another 20-40 minutes.
Suddenly, your 90-minute cushion has evaporated into a 10-minute window, or worse, a deficit. The mistake is assuming the process is efficient. The winning strategy is assuming it will fail and planning accordingly. You must operate with the knowledge that your available time is a fraction of what is printed on your ticket. Every decision must be made to claw back minutes, not seconds.
This isn’t about walking faster; it’s about thinking faster. The passengers who miss their flights are the ones who passively follow the crowd. The ones who make it are those who have already done the math and know they are in a race before the doors of the plane even open. Your first move is to conduct a quick audit of your connection’s viability.
Your 90-Minute Connection Viability Audit
- Map your critical path: List every choke point from deplaning at Terminal 5 to reaching your domestic departure gate (Immigration, Baggage Claim, Re-Check, Transit, Security).
- Calculate your true transit time: Start with 90 minutes, subtract 30 for boarding closure, and add a conservative 40 minutes if re-checking bags.
- Assess the gap: Confront your calculated time with the likely immigration wait. If you have less than 20 minutes of buffer, your connection is at high risk.
- Pinpoint your biggest risk vs. reward: Is it the baggage re-check queue (risk) or the Mobile Passport Control lane (reward)? Prioritize avoiding the first and exploiting the second.
- Formulate your immediate action plan: Decide now to use the MPC app, request a priority bag tag from the airline, and plan to walk between terminals if necessary.
Understanding this stark reality is the first step. Now, you need the tactics to beat the clock at each of these choke points.
How to Navigate the Automatic Transit System Quickly Between Busiest O’Hare Concourses?
After clearing customs in Terminal 5, the signs will direct you to the Airport Transit System (ATS), the train connecting all terminals. Following the herd here can be a critical error. The ATS is “landside,” meaning you must exit the secure area, travel, and then re-clear security at your domestic terminal (1, 2, or 3). This process can be slow, especially if a train has just departed or if there are crowds.
The savvy traveller knows the alternatives. First, the Terminal Transfer Bus (TTB) offers an “airside” (post-security) connection between Terminal 3’s G/L gates and Terminal 5’s M gates. However, its major limitation is its schedule; the official O’Hare airport guide confirms it only runs from 11:30 AM to 9:30 PM. If you’re outside these hours, it’s not an option. The second, more reliable alternative is walking. For connections between Terminals 1, 2, and 3, a network of underground pedestrian tunnels with moving walkways exists *post-security*. An aviation photographer’s analysis shows that a brisk walk from Terminal 1’s Concourse C to Terminal 3’s Concourse L can take under 30 minutes, often beating the process of exiting security, waiting for the ATS, and re-clearing.
Your decision matrix is simple: If your connection is between Terminals 1, 2, and 3, and you are already through security, walking is almost always the faster and more reliable choice. It puts the timing in your control, eliminating the variable of train schedules and queues. Don’t be fooled by the allure of an automated system; your own two feet are often your best asset.
This underground network is your secret weapon. While others are waiting for the train, you are already moving toward your gate, maintaining control of your timeline. The decision to walk is a classic example of a choke point bypass: a counter-intuitive move that saves critical time.
This strategic movement between terminals is crucial, but it’s irrelevant if you’re held up by the next major hurdle: your own luggage.
When to Recheck Your Luggage After Clearing Chicago O’Hare Border Control?
This is not a question of “when” but “how fast.” After collecting your bags and clearing customs, you will be directed to a chaotic area with airline-specific re-check counters. There is no other option. Wasting even five minutes here can doom your connection. Your luggage must be re-checked immediately, and you must be assertive. Do not stop for a coffee, a restroom break, or to check your phone. Go directly to your airline’s counter.
When you get to the agent, state your connection time clearly and urgently, especially if it’s under 90 minutes. Ask them to add a “priority” or “hot” tag to your bag. While not a guarantee, it signals to baggage handlers that your luggage needs to move on an accelerated timeline. Before you walk away, perform one final, critical check: verify the three-letter IATA code on the new baggage tag matches your final destination. A simple mis-tag at this stage means your bag is going on a different holiday than you are.
The most catastrophic error is to accidentally take your checked luggage with you towards the ATS or security. All checked bags *must* be re-checked here. If you proceed with them, you will be turned away at the TSA checkpoint and forced to return, losing at least 30 precious minutes.
The following table provides a strategic guideline for your re-check approach based on your available time. It’s a sobering look at the odds.
| Connection Time | Re-check Strategy | Success Rate |
|---|---|---|
| Under 75 minutes | Request priority tag immediately | Low (25%) |
| 75-90 minutes | Standard re-check with agent alert | Moderate (75%) |
| 90+ minutes | Normal re-check process | High (95%) |
| 3+ hours | Verify final destination tag | Very High (99%) |
Once your bags are on their way, you might find that your strategic moves have bought you more time than expected. How you use that time is the next decision.
Airport Lounge or Concourse Dining: Which Option is Best for a Three-Hour Wait?
While this guide focuses on surviving a tight connection, sometimes delays or exceptionally smooth transits leave you with an unexpected gift: time. If you find yourself with a layover stretching towards three hours, the question shifts from survival to comfort. The choice between a bustling concourse restaurant and the sanctuary of an airport lounge becomes relevant.
The decision should be driven by a simple cost-benefit analysis of your time. A lounge offers peace, reliable Wi-Fi, complimentary food and drinks, and sometimes even showers, but access comes at a cost, either via a day pass ($30-50), a premium credit card perk, or airline status. You must also factor in the walk to the lounge and potential waitlists during peak times. A good rule of thumb is that a lounge is only worth it if you have at least 90 clear minutes to enjoy it after accounting for travel time to and from your gate. For anything less, you’re better off with a quick-service restaurant or a grab-and-go kiosk near your departure gate. The primary goal is always to stay within a 5-10 minute walk of your gate as boarding time approaches.
A sit-down restaurant offers a better meal than a lounge but can be a time sink. Budget at least 45-60 minutes from being seated to paying the bill. This option is only viable on layovers of three hours or more, once you are certain of your gate and have passed security.
This decision matrix can help you choose the best option based on the time you have.
| Layover Duration | Best Option | Cost-Benefit Analysis | Key Consideration |
|---|---|---|---|
| 1-2 hours | Grab-and-go kiosks near gate | $10-15 meal, minimal time investment | Stay within 5-min walk of gate |
| 2-3 hours | Quick-service restaurant | $15-25 meal, 30-45 min total time | Check gate first, then explore options |
| 3-4 hours | Lounge (if accessible) | $30-50 day pass or credit card perk | Factor 15-min walk + potential waitlist |
| 4+ hours | Premium lounge or sit-down dining | Worth the investment for comfort | Consider shower access if available |
But before you can even think about dining, you must conquer the final boss of the O’Hare transit: the security queue.
How to Skip the Massive Security Queues During Chicago Winter Storm Delays?
After re-checking your bags and taking the ATS to your domestic terminal, you face the TSA security checkpoint. During normal operations, this is a predictable delay. However, during Chicago’s notorious winter storms, flight cancellations create a chaotic surge of rebooked passengers, turning security lines into stagnant rivers of misery. It is here that situational awareness becomes your most valuable asset.
Do not just walk to the nearest checkpoint. Pull out your phone and check the live TSA wait times on the FlyChicago website or the MyTSA app. Current O’Hare security monitoring shows that while average waits are 10-25 minutes, peak waits can hit 40-45 minutes, and the difference between two checkpoints in the same terminal can be over 30 minutes. Walking an extra five minutes to a less crowded checkpoint can save you half an hour in line. This is a simple action that 99% of stressed passengers fail to take.
For those with a high tolerance for risk and a desperate need for speed, another option is CLEAR. If the posted wait time exceeds 30 minutes, enrolling in CLEAR at one of their airport kiosks can grant you almost immediate access to the front of the line. It’s an expensive solution, but in a high-stakes situation where a missed connection costs hundreds of pounds and a day of your life, it can be the smartest money you’ll ever spend.
Beyond these macro-strategies, micro-efficiencies matter. Have your mobile boarding pass ready, your liquids in a clear bag, and your laptop easily accessible *before* you reach the agent. Every second you save fumbling with your belongings is a second you can use to walk to your gate.
- Check live data: Use the MyTSA or FlyChicago app to compare checkpoint times in your terminal.
- Walk to win: Be prepared to walk to a farther checkpoint if it has a significantly shorter queue.
- Have documents ready: Mobile boarding pass and ID should be in hand as you approach the queue.
- Prepare your bags: Laptops out, liquids in a clear bag, and pockets empty before you reach the conveyor belt.
Of course, your success at the security checkpoint depends entirely on how quickly you navigated the very first obstacle after landing.
When to Arrive at the Immigration Hall to Beat the Dreaded Three-Hour Queue?
The race begins the moment the plane’s wheels touch the tarmac. The key to beating the immigration queue is not just arriving at the hall, but arriving there *prepared*. The single most powerful tool at your disposal is the Mobile Passport Control (MPC) app. This official U.S. Customs and Border Protection app allows eligible travellers (including those from the UK using the Visa Waiver Program) to submit their information digitally and access a dedicated, much shorter processing lane. Travellers consistently report clearing immigration and customs in under 10 minutes using MPC, while those in the general queue wait for an hour or more.
The “Golden Window” for using MPC is crucial: you must submit your form *after* the plane has landed. The ideal moment is while the aircraft is taxiing to the gate. Complete your profile in the app before your trip, and as soon as you land and have a data signal, open the app, answer the questions, take a selfie, and submit. By the time you deplane, you will have a QR code ready, granting you access to the fast lane.
Another critical factor is your seat on the plane. Being one of the first to deplane can put you ahead of 100+ other passengers. A seat near the front of your cabin can save you 10-15 minutes, which can be the difference between making and missing your connection. This is especially true during peak arrival times, when live passport control data indicates waits of 60+ minutes are common between 6-9 AM and 6-10 PM.
Do not underestimate the power of these two strategies. While others are still waiting to get off the plane, you are already moving through a dedicated lane, having bypassed the largest single choke point of your entire layover. This is the ultimate application of the expert traveller mindset.
Mastering these tactics at O’Hare makes you a more capable traveller at any airport. The same principles apply to other complex hubs, like Miami.
Key Takeaways
- Your true connection time is your scheduled layover minus at least 60-70 minutes for fixed processes like boarding closure and immigration.
- The Mobile Passport Control (MPC) app is the single most effective tool for bypassing the longest queue at Terminal 5.
- Walking between domestic terminals (1, 2, 3) is often faster and more reliable than waiting for the landside ATS train.
When to Schedule Your Return Flight to Avoid Terrible Miami Airport Rush Hours?
Your immediate challenge is O’Hare, but the principles of strategic airport navigation are universal. To illustrate how these tactics apply elsewhere, let’s analyze another notoriously complex US hub: Miami International (MIA). Understanding its patterns will make you a smarter traveller everywhere, especially when planning future return flights from popular holiday destinations in Florida. Miami’s traffic is heavily influenced by two external factors: the cruise industry and its role as a gateway to Latin America.
The absolute worst time to schedule a flight out of MIA is on a Saturday or Sunday morning, between 8 AM and 2 PM. This is when tens of thousands of cruise ship passengers descend on the airport, creating gridlock at check-in, security, and even on the roads leading to the terminals. The airport becomes a sea of confusion; it’s a period to be avoided at all costs. Similarly, waves of arrivals from Latin America create a very busy period on weekday mornings (5-8 AM), while the corresponding departure wave clogs the airport in the evening (8-11 PM).
The optimal window for a stress-free departure from Miami is typically on a weekday afternoon, between 2 PM and 5 PM, when flight density is lower. The peak travel season of December through April, driven by both tourism and cruises, elevates traffic levels at all hours, so adding an extra 45-minute buffer to your arrival time is a wise precaution. With official MIA statistics showing over 5 million passengers in a peak month like July, scheduling your flight strategically is not a convenience, but a necessity.
This avoidance schedule is crucial for planning a smooth exit from a Florida holiday.
| Time Period | Traffic Level | Primary Cause | Recommendation |
|---|---|---|---|
| Saturday-Sunday 8 AM-2 PM | Extreme | Cruise ship disembarkation (36,000+ passengers) | Avoid completely |
| Weekday 5-8 AM | Very High | Latin America arrivals wave | Book after 9 AM |
| Daily 8-11 PM | High | Latin America departures | Depart before 7 PM |
| Weekday 2-5 PM | Moderate | Lower flight density | Optimal window |
| December-April | Elevated all hours | Peak cruise season | Add 45 min buffer |
Just as important as scheduling the right flight time is knowing the physical escape routes from the terminal itself.
How to Escape Miami International Airport Quickly During Peak Florida Holiday Seasons?
Knowing when to fly is only half the battle at an airport like Miami. The other half is physically escaping the terminal building, a task that can feel impossible during peak season. The arrivals level curbside, with its chaotic mix of private cars, hotel shuttles, and rideshare vehicles, is a major choke point. The expert move is to bypass it entirely.
After collecting your luggage, do not exit onto the arrivals level. Instead, take an elevator or escalator immediately up to the departures level. This area is often less congested, and rideshare drivers are frequently dropping off passengers, making for a quicker pickup. An even better strategy is to use the MIA Mover train to get to the Rental Car Center (RCC). Even if you are not renting a car, the RCC is a designated, less-crowded pickup zone for Uber and Lyft. This simple train ride can save you 15-20 minutes of sitting in terminal traffic.
Analysis of Miami’s layout shows that Concourse D, home to American Airlines’ massive operation, creates the most congestion. If you arrive there, walking to the far ends of the terminal—either north in Concourse D or south to Concourse J—can lead you to less-used pickup doors. Here are the key tactics for a rapid escape:
- Go High: Take an elevator to the departures level for a less chaotic rideshare pickup.
- Use the Mover: Ride the MIA Mover train to the Rental Car Center for the fastest and most reliable pickup point.
- Walk the Ends: Head to the far northern or southern ends of the terminal to find less congested curbside areas.
- Book Early: Order your rideshare while you are still at the baggage carousel to minimize your wait time outside.
By adopting this strategic, proactive mindset, any airport transit, whether at O’Hare, Miami, or beyond, transforms from a source of anxiety into a manageable, solvable puzzle. Start applying these tactics on your next journey to travel with confidence and control.